Category Archives: Uncategorized

“Summerpie” and The Livin’ is Easy

lemon pie slice on counter with rolling pin
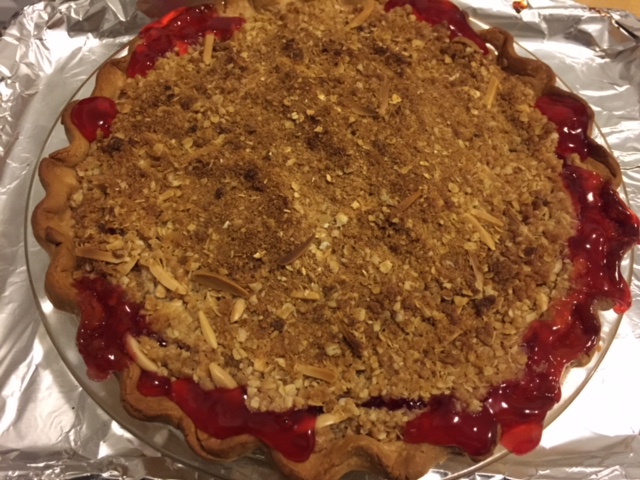
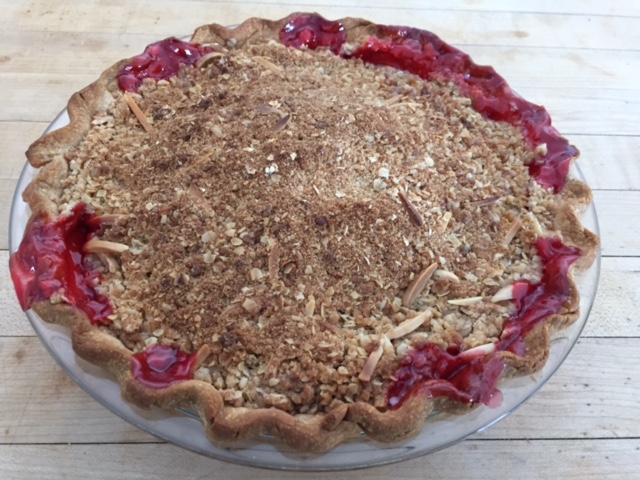
It’s that time of year again. Last weekend kicked off the season for picnics and officially wearing white pants without fear of fashion police. On a three day holiday weekend like this past Memorial Day, I usually find myself baking for at least one barbecue, a pot luck and some other outdoor eating event. This year was no exception. So what’s my all time favorite summer dessert? Well, it’s not a cake or cupcakes as the hot sun can do a number on buttercream frosting. Humidity often makes cookies soggy. Chocolate desserts can melt and recrystalize with those dreaded streaks of grey known as “bloom”. In my experience, nothing beats baking any kind of pie from the very old, well respected “Chess” family tree.

There has long been a debate about the origin of the name. Many of these pies came from the South so some people think the name “chess pie” is a colloquialism of “Jes’ pie” (or just pie). Personally, I’ve never felt convinced of that theory. Other’s claim there may have been cheese in the original recipes. However, I have extensively researched old cookbooks and have found no evidence to support that either. The most probable explanation is that “chess pie” evolved from the name “chest pie” and with good reason. As pastry goes, these pies are practically indestructible!
They hold up well at room temperature (even in hot weather) which was why they were probably locked away in colonial tin pie chests. Transporting them is a cinch too– no smashed merigue in picnic baskets. These pies are so portable–just wrap and go as soon as they cool off from the oven.

So what exactly is in a chess pie? They are filled with a simple combination of ingredients with a surprisingly rich and complex result. Always heavy on the butter and sugar, the flavor is not one to be forgotten. My most favorite of all chess pies is the most basic. What I call Colonial Chess Pie.The secret ingredients are white vinegar and a dash of nutmeg. The combination creates a distintive and addictive custard filling.two baked chess pies

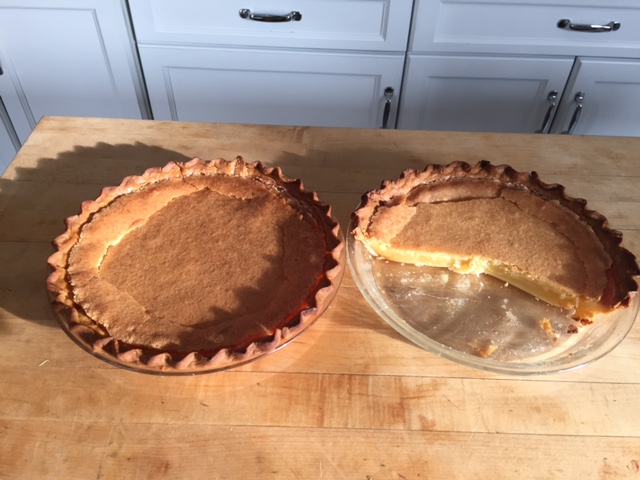
Familiar pies from the chess family include the timeless classic, pecan pie. Others are more forgotten by time like Transparent Pie or Jefferson Davis Pie. The first is simply a pecan pie sans pecans and the latter is a sugary mixture of dates and nuts. Even sweet potato and pumpkin pies are all part of the extended Chess family.

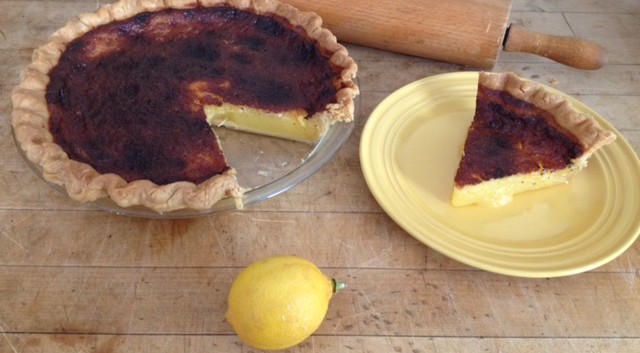
Today I’m sharing with you three of my favorite “summerpies”. The first is a Charleston Chess Pie that will really hit the spot if you are already a lover of lemon bars. The second is my humble favorite Colonial Chess Pie and the third is a fruity version of a pecan pie that I usually bake for Thanksgiving. I say “When in July, eat Louisiana Banana Pecan Pie“!

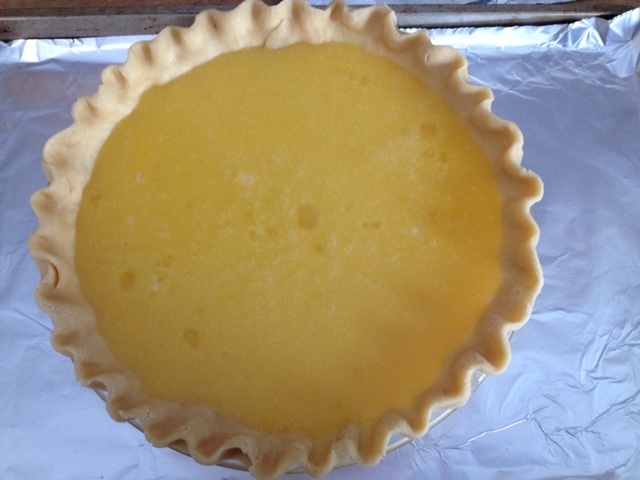
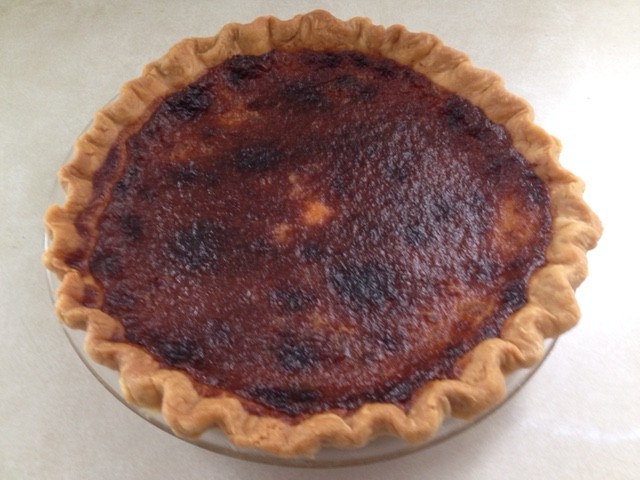
CHARLESTON LEMON CHESS PIE

2 cups granulated sugar
1 Tbs cornstarch
1 Tbs yellow cornmeal
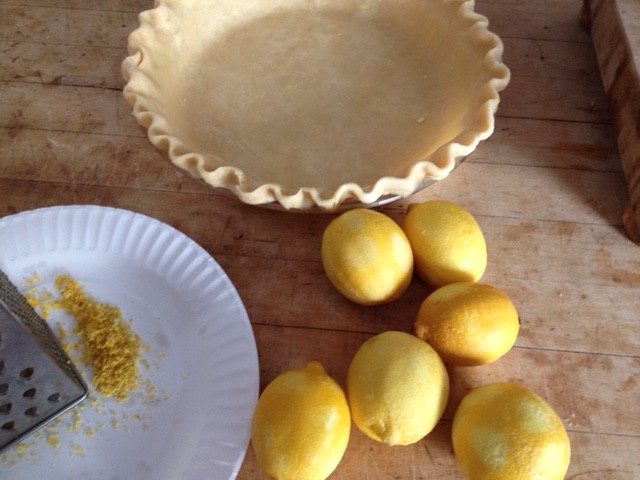
2 Tbs grated lemon peel
1 cup (2 sticks) melted butter
1/2 cup lemon juice
4 eggs
1 unbaked 9-10” pie shell
powdered sugar

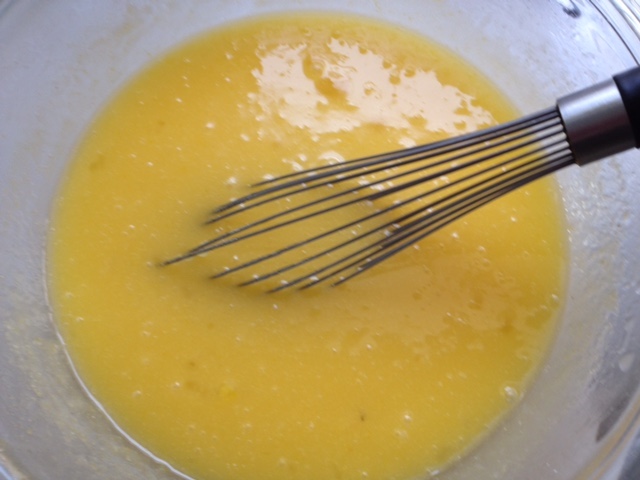
Preheat oven to 375°. Combine sugar, cornstarch, cornmeal and lemon peel in a large mixing bowl. Blend in melted butter. Beat lemon juice with eggs and blend into sugar mixture. Pour into pie shell and bake on the bottom rack of oven for 40- 50 minutes or until crust is golden brown. Cool 3 hours before cutting. Sift powdered sugar over each serving slice.
pie shell, lemons , graterwhisking lemon fillingpie shell:lemon filling to bakebaked pie

COLONIAL CHESS PIE

2 cups sugar
1 Tbs yellow cornmeal
1/2 cup melted butter
1/3 cup half and half or evaporated milk
1 tsp vanilla extract
1 Tbs white vinegar
4 eggs
1 unbaked 9″ pie shell

Preheat oven to 375°. Combine sugar, cornmeal and melted butter. Beat half and half, vanilla extract, vinegar and eggs together and pour into sugar mixture, blending until smooth. Pour into pie shall and bake on the bottom rack of the oven until crust is golden brown, cool 3 hours before cutting.


LOUISIANA BANANA PECAN PIE

1 cup firmly packed light brown sugar
1 tsp cinnamon
1/4 tsp salt
3 eggs, beaten
1/2 cup light corn syrup, or honey
1/4 cup (1/2 stick) melted butter
2 Tbs banana liqueur or rum
1 large ripe but still firm banana, cubed
1 cup toasted pecans, lightly broken
9-10” unbaked pie shell

Preheat oven to 375°. Combine brown sugar, cinnamon and salt in mixing bowl. Add eggs corn syrup, butter and banana liqueur or rum and blend until smooth. Line the unbaked pie shell with chopped banana and pecans. Pour filling over it and bake 40-50 minutes or until set and crust is golden brown. Cool 3 hours before slicing.

Beat the Crowd and Serve Mom Breakfast in Bed

Queen for a dayIn so many households, Mother’s Day dinner requires little effort other than planning ahead and dialing a phone number. According to the restaurant industry, more people eat out on Mother’s Day Sunday than any other day of the year. My birthday often coincided– or should I say collided with Mom’s day which often made it seem even more frustrating to get a table at a popular family eatery. If we could get in, our favorite dishes were off the menu, replaced with a limited choice of entree’s. One thing for sure, no reservations are required to treat Mom to breakfast in bed. When it comes to kid’s in the kitchen, French toast is fairly forgiving. There’s not too much that can go wrong. If prepared the night before, it will come out custardy. If it’s a last minute thought, it will still be fine— After all, it’s the thought that counts with Mom! One feature to include is a bud vase of flowers with some “flower faces” of the kids (see below) in the arrangement.

OVERNIGHT ORANGE FRENCH TOAST

8, thick slices (a little over an inch) of French bread or unsliced white bread
4 eggs
1 cup milk
1 tbs sugar
1/8 tsp salt
3 Tbs orange juice concentrate
1 tsp vanilla extract
1/4 to 1/2 cup butter

ORANGE BUTTER MAPLE MARMALADE SYRUP

FLOWER FACES

Beat eggs well with milk, sugar, salt, orange juice concentrate and vanilla. Place bread in a 9” x 13” casserole dish and pour egg mixture over bread. Cover an refrigerate overnight. (Note: if you do this at the last minute, just slice bread a little thinner and turn slices several times while soaking in the egg batter until saturated.) Melt enough butter in a nonstick skillet to brown toast about four minutes on each side. This may need to be done in two batches. Serve toast warm with scoops of orange butter and maple marmalade syrup. If desired , sprinkle with candied pecans.

ORANGE BUTTER: Soften a 3 oz pkg of cream cheese and a 4 oz stick of butter. Beat together with 2 tsp of fresh grated orange peel until fluffy.

ORANGE MARMALADE SYRUP: Heat equal parts orange marmalade and maple syrup until melted, using a saucepan or microwave.

FLOWER FACES: Select photos of each child and cut out in a circle around their head. Paste in the center of flowers cut from craft foam, mounted on green pipe cleaners. Place in a bud vase and arrange on a breakfast tray with the French toast, fresh fruit and a copy of The Connecticut Post.

photo vase with text

When Easter Comes “Early”

table

You must wonder… “What is she talking about?” Easter is considered “early” when it’s the Sunday after St Patrick’s Day. This year it’s the first weekend in April, not exactly late just somewhere in between. Well this year I have a brother coming up from Washington DC and cousins from Florida and New York so in order to see everyone at the same time, we are having Easter dinner this year on a Saturday night. It’s amazing to me how just having one less weekend day to prepare makes it seem like crunch time for the cook. I always motivate myself by setting the table first. Something about getting all of that under control gives me a false sense of security that everything is under control. When you think about it, that actually translates into a very real sense of pre-party calm.

peep place setting I made a large nest of easter grass in the middle of the lavender dining room table runner and decorated with malted milk eggs, dyed hard cooked eggs and, of course, PEEPS. (I even have a big stuffed PEEP as a centerpiece). I also had a lot of pastel Mardi Gras beads in storage so I decided they blended well with the Easter theme.big peep

This year I started with my most time consuming dishes and prepared them Thursday night: The first is a creamed kale casserole with fire roasted artichoke hearts and a panko breadcrumb topping:kale topped with artichokespanko topped kale

This will turn a golden brown after baking in the oven for half an hour. Next I made my Yukon Gold baked potato casserole with a chive cheese sauce. First I sliced the potatoes in half and roasted them on an oiled baking sheet.Yukon Potatoes on foil

Then I made a bechemel sauce with a blend of cheddar and Swiss cheese and chives.making sauce I sliced the roasted potatoes, covered them in the cheese sauce and topped with more grated cheese. Just like the kale casserole, it will reach it’s full glory when baked to a golden brown.finished potato casserole ready to bake Right now both are wrapped up in the fridge waiting for Saturday night. Then comes the ham. It’s also waiting in the fridge to be baked by my friend and neighbor to free up my oven at the last minute. hammexican cokeThis year I saw a display for Mexican Coca Cola in a glass bottles so I decided we should try glazing it with Caco Cola the way my Aunt Liz from New Orleans used to do. And of course there’s the cherry sauce. I sometimes find it a little mundane so I spiked it up with pomegranate-blueberry vinegar and dried blueberries.cherry sauce Next I started cooking asparagus for a vinaigrette salad (sorry no photo of the finished dish yet-update to follow.asparagus in pot)                                                                                Finally there’s dessert. I haven’t even gotten started on that yet but it’s going to be an orange ginger cake. I guess you’ll have to check in for the finished dish updates after our early Easter dinner. Not sure I’ll get to it tonight. I’m already all “Peeped Out”.

Which brings me to my original intention for my Easter post. I make these really fun, kid-friendly, do-it-yourself Easter “Peeps” using coconut, lemon Jello and sweetened condensed milk. I was going to show you the step by step process but I think you’ll get the idea from this Connecticut Post column that I have written the transcript out for you since the print is kind of small :

Make Your Own “Peeps”   EASTER CHICKS

Easter Chicks column April


It’s Easter basket time again. Nestled with chocolate eggs and bunnies are those marshmallow chicks that have have become a nostalgic treat from one generation to the next. I looked up the company’s official website and learned that prior to 1954 it took 27 hours to produce a Peep by hand. Now, it only takes 6 minutes to produce a mechanized Peep. As a child, I was a fan of “petrified Peeps”. The process involved drying them on top of my dresser until they reached the perfect crunchy consistency (sometime in June). I used to think this was an acquired taste until I read that a preference for eating them stale was #6 on the company’s fun facts list. Now, if you think I’m about to tell you how to replicate marshmallow Peeps in your own kitchen, you’re going to be disappointed. Instead, I’m sharing with you a very different type of chicken candy that I invented when I was about ten years old. Mom used to make a coconut concoction with strawberry gelatin and shaped it into strawberries. One day I said “Lets use lemon gelatin”. However, the yellow strawberries were not well received. I reshaped the strawberries into little chicks and suddenly they were a hit with my family and friends. These are a fun project to make with your kids. Modeling the candy is kind of like working with marzipan only a lot less expensive. Nest them in egg cartons lined with tinted green coconut and they make great gifts.

LEMON COCONUT CHICKENS IN EGG CARTON NESTS Ingredients:

(Note: makes 2 dozen candies–enough to fill 2 egg cartons)

3-ounce package of lemon flavored gelatin

5 1/2 cups flaked coconut (about one 14-ounce bag)

14-ounce can of sweetened condensed milk 1-2 drops yellow food coloring

Slivered almonds, lightly toasted

Semisweet chocolate minichips.

Combine gelatin, coconut, condensed milk and food coloring in mixing bowl Set aside 1/3 of mixture for heads. Mold remainder into 24 balls. Shape reserved mixture into 24 smaller balls fort heads. Press small balls firmly on top of larger balls. Insert two almonds into each head for “chirping” beaks and use chocolate minichips for eyes.blurry chicks with newspaper showing


Egg Carton Nests:

2 egg cartons (bottoms only)

2 cups shredded coconut

1 Tbs water mixed with two or three drops of green food coloring clear cellophane, ribbon.

Tint coconut green by shaking in a large jar or plastic zipper bag with colored water. Spred on a tray and allow to air dry. If desired, you can cut cartons into half-dozen sections. Line individual egg carton cups with green coconut and set each chick in the a cup as if it were in a tiny nest. If giving as gifts, wrap cartons in cellophane and tie at each end with ribbon.chicks with about alison boteler

HAPPY EASTER!

The Doves of Downton Abbey Debut

Tonight’s the night! The 20th anniversary of Project Return’s Annual Birdhouse Auction. This popular event attracts whimsical and creative structures for indoor and outdoor use as well as bird themed art. It all goes to a great cause supporting girls in crisis. The auction is held at the Rolling Hills Country Club in Westport CT after a preview of the artwork is displayed for two weeks in the storefront windows of Westport CT. This will be the third year I’ve participated in the event.

20 years

Most people think of me as a cookbook author but there’s another side of me—The side that grew up drawing  from life as I saw it on Saturday morning cartoons.  Those were the days when cartoons were still created on cells before the age of computers. I particularly liked all of the detail in the really early Disney cartoons that my parents used to watch in movie theaters with feature films. It got to the point where I actually “dreamed in cartoon”. I loved my two dimensional world. It was a happy retreat for me where anything was possible. My imaginary friends weren’t invisible to my family, I’d drawn portraits of all their familiar faces.  Best of all was  I wanted to design my own hat or coat I’d just draw them and like magic they were right there before my eyes.

There was just one problem with my artwork then and now… I never really mastered the human form or face. My people always looked more like political cartoons (recognize Nixon, tailors Haldeman Erlichman and “Little Johnny Dean?).  As a teenager, I wrote a fractured fairy tale turning Watergate into The Emperor’s New Clothes !Watergate cartoons

So I decided to stick to what I know best whether it was  dressing  household pets  to prehistoric animals as paper dolls. Here I have some dapperly dressed dogs :dapper dogs sketchdapper dogs color

And some “Designosaurs”CelesteDaphne:

For the 2013 Project Return Birdhouse Auction, I decided my paper doll concept was for the birds and created the character Alfred Albatross who ended up in the window of Brooks Brothers:

alfred albatross

brooks brother's window


This year I got this inspiration to dress doves in the Edwardian and 1920’s attire from Downton Abby and put them into a coatrack frame. It was on display inside Brooks Brothers until tonight where it will be up for silent auction. sketcheson the red tableclothfull view with shirts

This will be the first year where credit card bids will be made by cell phone so the mantra is “CHARGE”— Both as much as you can!

sign


Celtic Creamed Kale Sprouts and Corned Beef

Some people like to mix things up on Thanksgiving with pomegranate glazed turkey or hazelnut stuffing. I’m not saying I’m one of those but I do tend to deviate from the norm now and then on Saint Patrick’s Day. Many times I’ve substituted Brussels sprouts for boiled cabbage or I will make an “Irish Tiramisu” using Bailey’s for dessert. This was one of those years for me. I decided to serve my corned beef as a side dish. In this case, I only needed about 6 oz of slivered deli corned beef but you can make this dish even better the day after if you have your own boiled corned beef from the main event.

I’ll admit I was inspired by kale sprouts I’ve recently started seeking out at Whole Foods. They are a product of Belgium and come in a 150gm bag.

bagged kale

They are really quick to cook. I simply trim off some some of the brown leaves from the sprouts and arrange in a large shallow glass bowl. Fill with about 1 1/2″ of water. Sprinkle with sea salt and microwave on high for 3 minutes. Stop microwave, redistribute them in the water, and cook 1 minute longer.

about to be steamed

Drain Sprouts well on a paper plate and allow to cool to room temp.

DRaining on paper plate

Roll sprouts in a paper towel to squeeze out excess moisture.

rolled in paper towels

Now for the cream sauce: heat 2 cups of milk with 2 tbs fresh snipped chives in the microwave for 2 minutes.

chives in milk

Make a roux by melting 1/4 cup butter and blending in 1/4 cup flour, 1/4 tsp salt, 1/2 tsp onion powder a few grinds of black pepper and a dash of nutmeg. Blend together with a wire whisk over medium heat until bubbly and smooth.

making a roux

Blend in heated milk and bring to a boil, stirring until thickened.bechemel thickens

Take about 6 ounces of deli sliced corned beef, roll up and slice into julienne strips. (If you are using home-cooked corned beef, just chop up leftover meat since the texture tends to break apart more when simmered on your stove.sliced corned beefshredding corned beef

Stir into chive cream sauce. Add drained kale sprouts.sauced corned beefFolded sprouts into sauce

Spread into a casserole and cover with buttered breadcrumbs.

Unbaked Crumb toppedBake at 350° for 20 minutes or until breadcrumbs are golden and bubbling.Finale kale

This actually a great post- St Patrick’s Day dish just like a turkey casserole after Thanksgiving. There I go again comparing the two holidays. I can’t tell you how many times I say Happy Thanksgiving to people on St Patricks Day!


Kite Season


kite Tree

Well here it is the first of March and looking outside at yet another snowstorm doesn’t make one feel that spring is around the corner. I grew up believing that the first rite of spring was bringing a kite out into Loose Park where I grew up in Kansas City. Perhaps  spring arrives a little later New England or six month winters are the new normal nation wide. One can still dream of warmer,  windy days ahead as it was when this column of mine first appeared in The CT Post in 2006.

Kite season

March usually comes in like a lion and goes out like a lion with a few lamby days in between. It’s those bucolic, breezy ones that send us out in the field for the springtime tradition of kite flying. Kites have gone pretty high tech, these days. Others are as elaborate as Chinese dragons or flying fish. However, I love the classic diamonds in the sky as seen in so many calendars from my childhood. I grew up reading Peanuts comic strips and (just like Charlie Brown) was frequently foiled by a “kite eating tree”. Something about a windy day really stokes the appetite of large oaks. This project takes a branch from one and turns it into a miniature tree… a perfect magnet for mini kites. It’s a fun table centerpiece and lends itself to a group project where kids can put their names on the kites. Just as nature intended, some should be hanging upside-down or impaled on a branch. For added interest, throw in a box kite or two. I don’t know about you but I could never get one of those off of the ground!

KITE TREE & PAPER KITES

Materials:

Branch from a tree or bush (any species with plenty of twigs for small branches)

Flower pot or planter,

florist clay or Play Doh,

pebbles or colored sand

Wooden shish kebob skewers, wire cutters

Lightweight string or crochet yarn

Construction paper, scissors, glue stick, marking pens, transparent tape

Assorted colors of 1/8” thick satin ribbon

Anchor branch in the center of a pot or planter using a large lump of clay. Fill in around the sides with pebbles or colored sand. Use wire cutters to cut skewers into 3” and 4” length sections. (For diamond shaped kites, you’ll need one 3” and one 4” stick. For box kites you will need four, 4” sticks) For diamond kites: Bind 3” and 4” sticks together like a cross, tying with string in the center. Cut assorted colors of construction paper into diamond shapes that fit across the cross sticks (make one diamond as a pattern and cut the rest the same way). Cut contrasting strips of construction paper to glue on as stripes. These can be vertical, horizontal or diagonal. Make kite tails by knotting short lengths of alternating colored ribbon in a chain. Tape tails to the back of kites. Tie a 12”, or longer, length of string to the center each of kite’s crossbar (from back). Tape paper fronts on to kite, from back, leaving flying cord free. If desired,label with children’s names.

Kites


For box kites: Cut two, 1” x 6” strips of construction paper for each kite. Fold strips six times at 1” intervals. Overlap two ends and glue together, forming a square. Connect squares by taping edges of 4” sticks at the the inside corner edges. Tie a 12” or longer length of string to an exposed stick. Tape tails inside of bottom section. Arrange kites in the tree as if they crashed into it or became hung up in a branch. The more string tangled in the branches, the better.

Box Kites

From Cherry Trees to Wooden Teeth– Happy Birthday Mr President!

george washington cherry treeIt’s cherry season again. Not when the trees blossom or or the fruit ripens but the month that has become synonymous with cherries. As a food writer for most of my life, it’s a given that any column you do in February should involve themes of chocolate or cherries or both. We are now past Valentines Day and sandwiched between Presidents Day and  Washington’s official birthday which means it’s time for cherry pie.

Before we start the recipe,  let’s first review the cherry tree legend. From our earliest days in elementary school, we were taught that young George Washington was given a small hatchet at age six to play with and went to town whacking away at bean posts in his parent’s garden. Something possessed him to take a swing at his father’s cherished cherry tree. When George’s father first discovered his favorite tree had been axed he was angry. George supposedly came forward and fessed up because he “could not tell a lie”. This impressed his father who valued his son’s honesty over a thousand trees . The iconic tale has been one of the first lessons on values in American classrooms. There’s just one problem with it (aside from the bad choice of toys for one’s child): most historians agree that it never happened.

black & white George Washington cherry tree

The story was first published by biographer Parson Weems in 1809. The tale came from Weem’s interviewing a neighbor who had known Washington as a boy. This is the only historical source and not considered to be very credible which brings us to the next famous folklore. Washington most likely did not eat his cherry pie with wooden teeth. He had notoriously bad teeth, in fact he had only one tooth left by the time he became president. Instead, he wore dentures fashioned from cows teeth, hippopotamus  ivory even human teeth his dentist had purchased from slaves. None of these worked out that well because Washington was said to have been plagued his whole life with chronic pain from his false teeth.

This year my spin on the cherry tree/ cherry pie theme has a classic crumb topping with some toasted almonds in it. It’s a great version for those of us with a sweet tooth who like the contrast to tart cherries.

Cherry Crumb Pie

1 cup firmly packed light brown sugar

3/4 cup quick cooking rolled oats

3/4 cup all purpose flour

1/4 tsp salt

1/2 cup butter, cut into cubes

1/3 cup sliced almonds, lightly toasted

1 unbaked 9″ pie shell (I prefer baking in a glass pie plate)

Cherry pie filling for 9″ pie  (see below)

Combine brown sugar, oatmeal, flour and salt in a mixing bowl. Using a pastry blender or two knives, cut butter into dry ingredients until crumbs are about the size of small peas. Stir in almonds.

cherry pie 7cherry pie 6

Spread cherry pie filling into unbaked pie shell.

cherry pie 5

Cover filling with crumb topping and place on a foil lined baking sheet.

cherry pie 3

Preheat oven to 375° and bake on the bottom rack of oven for 50 minutes or until crust looks golden. I like to use glass pans for this reason. If the topping starts to brown much faster, lay a piece of foil across the top of the pie during the last 10 minutes of baking.

cherry pie 2

Cool to room temp before slicing.

cherry pie 1

Cherry Pie Filling

4 cups fresh or frozen tart cherries

1 1/3cups granulated sugar

5 tablespoons cornstarch

1/4 Tbs almond extract (optional)

Place cherries in medium saucepan and place over heat. Cover. After the release most of their juice, which may take several minutes, remove from heat. In a small bowl, mix the sugar and cornstarch together. Pour this mixture into the hot cherries and mix well. Add the almond extract, if desired, and mix. Return the mixture to the stove and cook over low heat until thickened, stirring frequently. Remove from the heat and let cool.


CRAZY CROQUET FOR VALENTINE’S DAY

CRAZY big


If you are still hiding the kid’s leftover Halloween candy, there are other ways to celebrate Valentine’s Day without overdosing on chocolate. How about an activity that actually helps them burn off a little of that sugar rush? I like to turn to Alice in Wonderland’s Queen of Hearts for inspiration. When she played croquet, it was no ordinary match. The court would swing pink flamingos at roly-poly hedgehogs. This is a great game indoors as well as outdoors. Think rainy day miniature golf and dream up your own obstacle course using stuffed animals, sofa cushions for tunnels and books for ramps. I even like to make big, bend able wickets out of playing cards and pipe cleaners. An ordinary croquet set can be transformed into a flock of flamingo mallets with some easy-to-sew felts heads. Rules…What rules? Unlike traditional croquet this is an improvisational sport. However– should anyone get too unruly shout “Off with her head”! (and take a time-out.).

FLAMINGO MALLETS & HEDGEHOG BALLS
(Note- croquet sets vary from 4 to 8 mallets. Materials are listed per individual mallet.)
Materials:

    Light pink felt (a 9” x 12” rectangle will make one head
    Yellow felt (a 9” x 12” square will make about three beaks)
    Pencil, sheet of 9” x 12” paper, scissors, craft glue, pins, thread and cotton batting (or cotton balls)
    Pink pipe cleaners, glue-on hobby eyes, pink craft feathers 4” or 5” styrofoam balls (one per mallet)
    Acrylic paints (deep pink, black and shades of brown) brushes and sponge brush
    Playing cards, white pipecleaners, invisible tape

Fold a piece of pink felt in half (6” x 9”) and cut through both layers into sort of a light bulb shape. Cut remaining pink felt the same way. Fold yellow felt in half (6” x 9”) and cut through both layers to make crescent shaped beaks. You should be able to get 3 double sided beaks out of one square. Glue two sides of each beak together and allow to dry. Pin beaks to one side of felt heads, facing inward. Pin remaining felt head piece on top and sew around edges, leaving bottom open.flamingo heads 2

Turn inside out. Stuff heads with cotton and place over ends of mallets. Secure around stick with a pink pipe cleaner. Secure feathers around neck by wrapping with pipe cleaner. Paint end of beaks, mouth and nostril with black paint. Accent head of flamingo with darker pink paint. Glue on hobby eyes. Paint styrofoam balls to look like furry brown hedgehogs.HEDGE HOG BALL

Twist ends of white pipe cleaners together to add length. Tape cards along two parallel cleaners and bend into a D- shaped wickets.

card wickets

When I look out the window this winter, it’s hard to believe there was actually a February when we kid-tested this game for my column in The Connecticut Post on my neighbor’s lawn!

However, you can just as easily set up Crazy Croquet in your living room as we are about to do! What a way to enjoy yet another snow day.

Mallets


Snow Day Snow Men

full size snowmen

I’ll admit I’m sentimental (not about snow storms, they drive me nuts!) but about the first kid’s column I ever wrote for The Connecticut Post.

snowman mix it up with kids


Years ago, I was very excited the Saturday it was coming out. It was a monthly column, a whole full page on recipes and crafts for children. Naturally, the calendar begins in January and I thought ice cream snow men made the perfect project: Something to do when you’re cooped-up with your kids on a snow day. Only problem was… it was springlike weather all month!

snowman teaser

I almost ran out of  month waiting for a really good blizzard to re-publish my old January column on this blog and here the storm is turning to rain. Truth is, I couldn’t be happier!

So stock up on ice cream and coconut the next time the media is predicting snowmaggedon and  here’s the transcript from the article below:

You’re up an hour early listening for school cancellations. You call the snowplow guy and his message box is full. The car is somewhere out there underneath a snowdrift. You’d like to pull a warm, cozy blanket over your head and hibernate but when the weather outside is frightful— so are the kids! Relax… the best cure for kiddy cabin fever is to occupy them with a new and memorable activity. Once you’ve heard that winter storm warning (it’s coming, it’s coming), when you’re out raiding the supermarket for bread and milk, just pick up a few extra ingredients for sweet and savory snow men. Even if the blizzard is a bust, you’ll be prepared for the next snow day.

Frosty Ice Cream Snow Men

(Note: This recipe will make about six, more or less depending on the air content of the ice cream)

1/2 gallon vanilla ice cream

Shredded coconut (at least 2 cups in a shallow pan or plate) Miniature chocolate chips

Fruit roll candy (in strips)

6 chocolate covered mint patties

6 chocolate bon bon type candies

Toothpicks. Full size and mini-size ice cream scoop (very useful to have-available at cookware shops)

For each snowman: Roll two large scoops of ice cream and one small scoop in coconut. (Place scoops on a foil lined tray in freezer, while making the others) Stack one large scoop on top of the other and stack the head on top of that. Use chocolate chips to make eyes, nose, mouth and buttons. Cut strips of fruit roll candy and wrap around the neck of snowman for a scarf. Make a bowler hat out of the chocolates by spearing a toothpick through the mint patty and the bon bon so that the bon bon becomes the crown and the mint patty is the brim, secure in place on head. Keep frozen until ready to eat

snowmen copy 2

snoman column

A Few of my Favorite Things: Part 2

Parmesan crisps

It’s that time of year when everyone in the house has been “cutting back” after the holidays and trying to stick to new, healthier regimes. My New Year’s resolution was walking a mile and a half every day. Why a mile and a half? Because last year my resolution was to walk a mile every day and, I’m proud to say that I actually did it! It wasn’t easy because I live in the North East and walking outside in the winter can be treacherous most of the time (take it from one who’s a “frequent faller” on ice).  Mall walking is great but I live too far from a mall to waste time and gas to drive there. My solution is walking in circles around the periphery isles of Home Depot or BJ’s Wholesale club which are a short distance from the house. Sometimes I’ll even use Whole Foods for my exercise track but it takes more laps around the place. I use the pedometer iPhone app to know how I’m doing but, in general, it takes six orbits around my track to to reach this goal.

It’s not only a good work out for the body but for willpower as well. To any shopper,  there’s the desire to stop and check some new product that catches your eye but that has to wait until I’m done with my mile and a half. One of my favorite discoveries this year has been ready made Parmesan crisps. These have always elevated any Caesar salad to a whole new level and if you skip the croutons it makes a perfect meal for anyone who’s doing Paleo or low carb (as so many are in the bleak month of January). Parmesan crisps are very basic and simple  to make. You just bake grated piles of Parmesan cheese on baking sheets until they form crispy, lacy wafers— but when I’ve been walking for miles, I get lazy and would much rather pick up a box.

To my delight, I have stumbled upon two excellent brands. I first came across these Kali Parmesan Crisps for $7.99 at whole foods.whole foods parm crisps

About a month later I noticed these Simply Indulgent Gourmet Parmasan Cheese Crisps at BJ’s Wholesale club for $4.99.BJ's Crisps


Both products are excellent and the only real difference is that the Simply Indulgent Gourmet Parmesan Crisps contain a trace of potato starch and their label list having 1 carbohydrate per serving as opposed to Kali’s 0 carbohydrate per serving but it a savings of three bucks so it’s a matter of which matters most to you.

So how do I use these things? On salads and soups of course. They are even a good dip dipper if you are off of eating chips. My go to favorite will always be a Caesar salad. I like to do my chopped style– where you toss the romaine with dressing, pack it into a bowl, invert it on your plate and garnish with a Parmesan crisp– a totally guiltless pleasure.Caesar with crisps