Well here it is the first of March and looking outside at yet another snowstorm doesn’t make one feel that spring is around the corner. I grew up believing that the first rite of spring was bringing a kite out into Loose Park where I grew up in Kansas City. Perhaps spring arrives a little later New England or six month winters are the new normal nation wide. One can still dream of warmer, windy days ahead as it was when this column of mine first appeared in The CT Post in 2006.
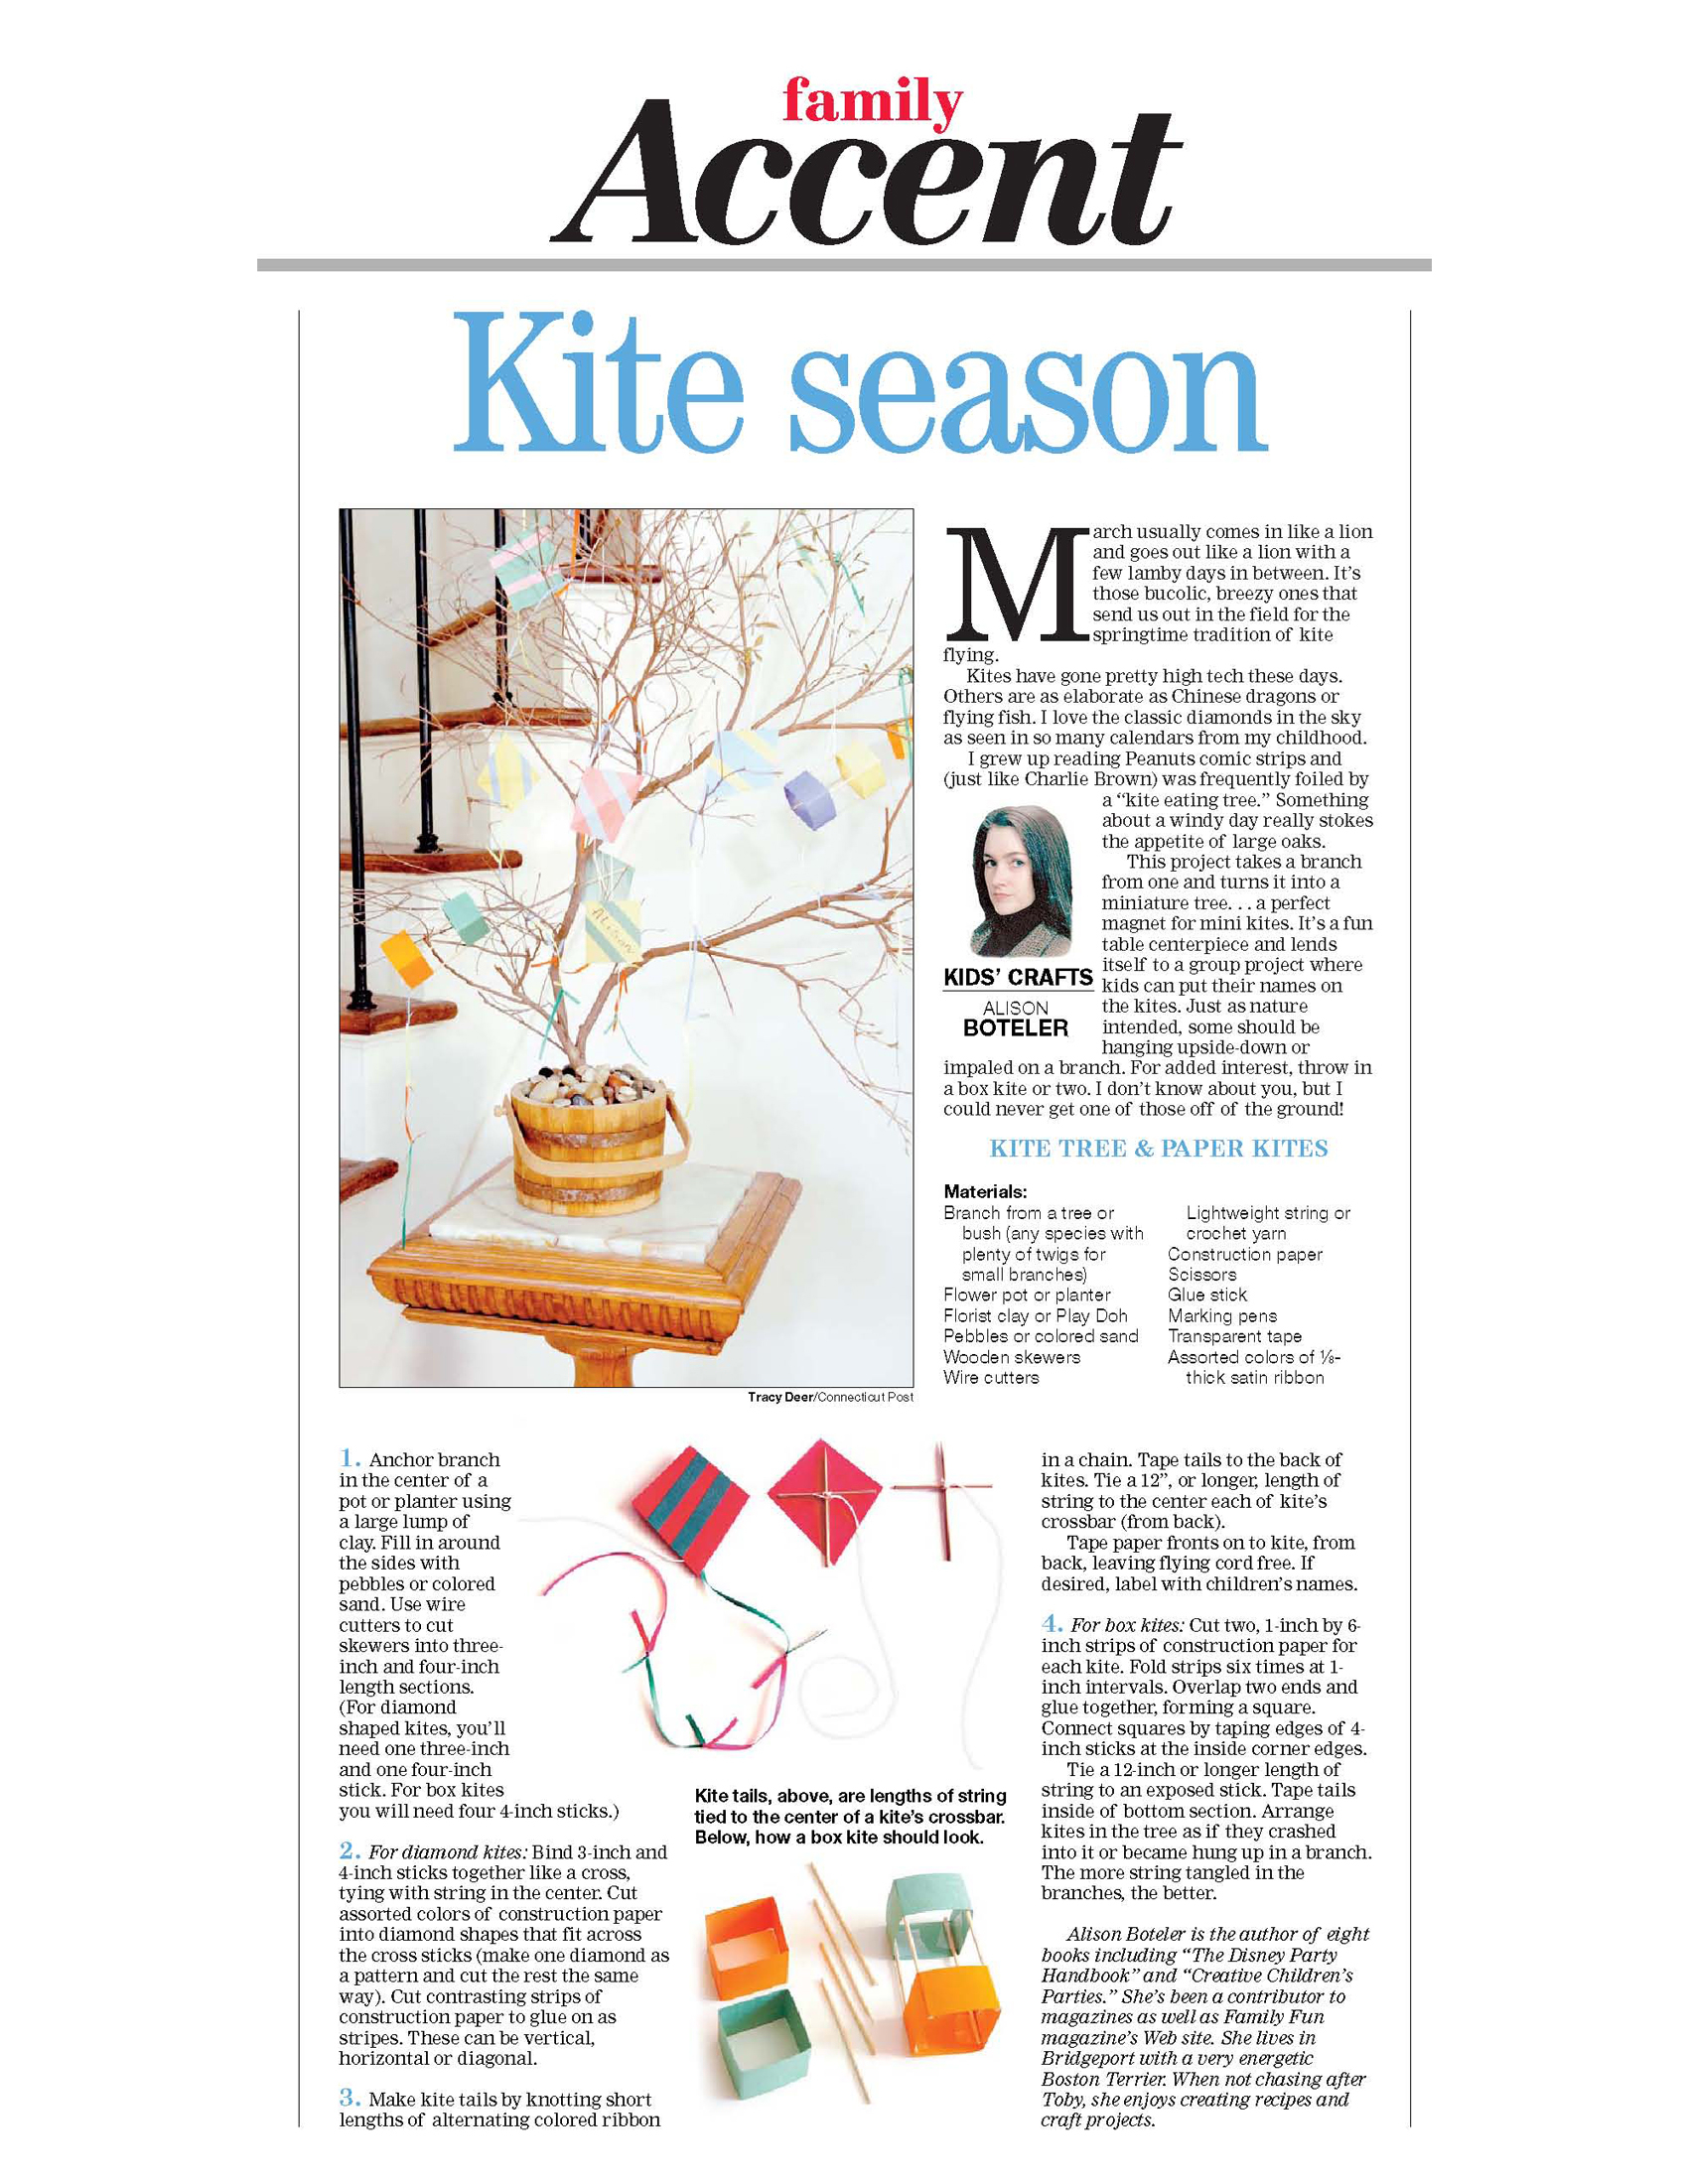
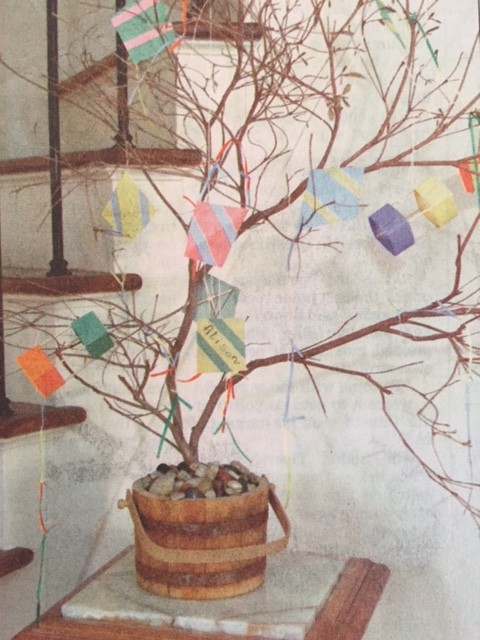
March usually comes in like a lion and goes out like a lion with a few lamby days in between. It’s those bucolic, breezy ones that send us out in the field for the springtime tradition of kite flying. Kites have gone pretty high tech, these days. Others are as elaborate as Chinese dragons or flying fish. However, I love the classic diamonds in the sky as seen in so many calendars from my childhood. I grew up reading Peanuts comic strips and (just like Charlie Brown) was frequently foiled by a “kite eating tree”. Something about a windy day really stokes the appetite of large oaks. This project takes a branch from one and turns it into a miniature tree… a perfect magnet for mini kites. It’s a fun table centerpiece and lends itself to a group project where kids can put their names on the kites. Just as nature intended, some should be hanging upside-down or impaled on a branch. For added interest, throw in a box kite or two. I don’t know about you but I could never get one of those off of the ground!
KITE TREE & PAPER KITES
Materials:
Branch from a tree or bush (any species with plenty of twigs for small branches)
Flower pot or planter,
florist clay or Play Doh,
pebbles or colored sand
Wooden shish kebob skewers, wire cutters
Lightweight string or crochet yarn
Construction paper, scissors, glue stick, marking pens, transparent tape
Assorted colors of 1/8” thick satin ribbon
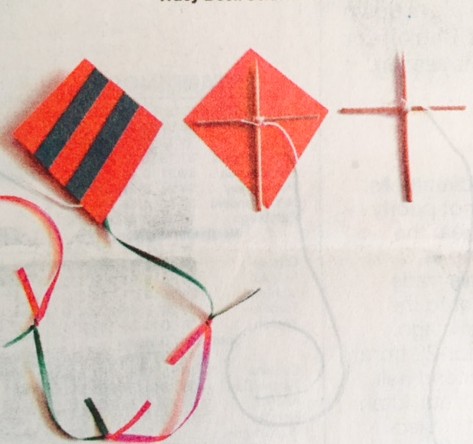
Anchor branch in the center of a pot or planter using a large lump of clay. Fill in around the sides with pebbles or colored sand. Use wire cutters to cut skewers into 3” and 4” length sections. (For diamond shaped kites, you’ll need one 3” and one 4” stick. For box kites you will need four, 4” sticks) For diamond kites: Bind 3” and 4” sticks together like a cross, tying with string in the center. Cut assorted colors of construction paper into diamond shapes that fit across the cross sticks (make one diamond as a pattern and cut the rest the same way). Cut contrasting strips of construction paper to glue on as stripes. These can be vertical, horizontal or diagonal. Make kite tails by knotting short lengths of alternating colored ribbon in a chain. Tape tails to the back of kites. Tie a 12”, or longer, length of string to the center each of kite’s crossbar (from back). Tape paper fronts on to kite, from back, leaving flying cord free. If desired,label with children’s names.
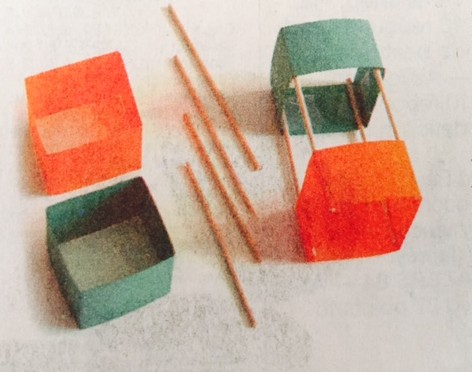
For box kites: Cut two, 1” x 6” strips of construction paper for each kite. Fold strips six times at 1” intervals. Overlap two ends and glue together, forming a square. Connect squares by taping edges of 4” sticks at the the inside corner edges. Tie a 12” or longer length of string to an exposed stick. Tape tails inside of bottom section. Arrange kites in the tree as if they crashed into it or became hung up in a branch. The more string tangled in the branches, the better.